Since many people asked me how I made the helmet, and I also wanted to see its progress in one single image myself, I made this collage and this “tutorial” for all of you :3 I must make clear that I’m not specially good with props (I’m pretty clumsy when it comes to things like this, actually ^^u), so the final result made me so happy *>_<* (I’m talking about v2 of course, v1 was horrible XD). It has quite a few flaws anyway: I should’ve spent even more time sanding it (and I discovered that’s a golden rule when cosplaying: sanding is a pain in the butt, but you’ve got to take your time doing it, and most of the times you’ll feel it’s not enough @_@), and the most blatant error (even if sometimes it doesn’t show because it depends on the light) it’s that the tinted sheet I used to darken the visor has a lot of ugly wrinkles. I think I know how I can fix that, so there’ll probably be a v2.1 (and hopefully final XD).

01. This was the helmet at the beginning. I bought it at Cash Converters (a second hand store) for 10€ ($14 aprox.) XD For those wondering about health and hygiene issues, I washed the inside thoroughly before starting to mod it, and I’m still alive and it doesn’t have any weird smell or anything like that ^^u (I’m not totally sure since I’m not a driver myself, but I think they sell a specific cleaning spray for helmets if you want to try that instead). What I don’t like about the base helmet is that it’s too big for my body (I have a small & curvy frame, and proportions just don’t look good) and it’s too round as well. Celty’s helmet is small and has more of an oval shape, so take that into account when you buy your base helmet! First thing I did was removing the visor to avoid damaging or scratching it, and also for working with more ease. Then I removed all its vinyl stickers, and cleaned their glue leftovers with acetone. The helmet had a coat of varnish that was applied after putting the stickers, so I needed to remove it as well, this time with my electric sander. This also helped in making the surface more prime/paint-friendly.

02. When I finished sanding, I used a few stripes of craft foam to “measure” the curve of the helmet so that the ears will sit perfectly on it later. I put them on the helmet, secured them with duct tape, covered them with white glue and then applied heat to harden the foam and “transport” the curvature to the stripes. I removed them from the helmet and used them to cut the materials for the ears. This step is quite hard to explain, I’m afraid >_< (and I’m sure there are better ways to do this, but I couldn’t think of anything, I fail at planning, technical drawing and making props “the right way”, as I said at the beginning ^^u).
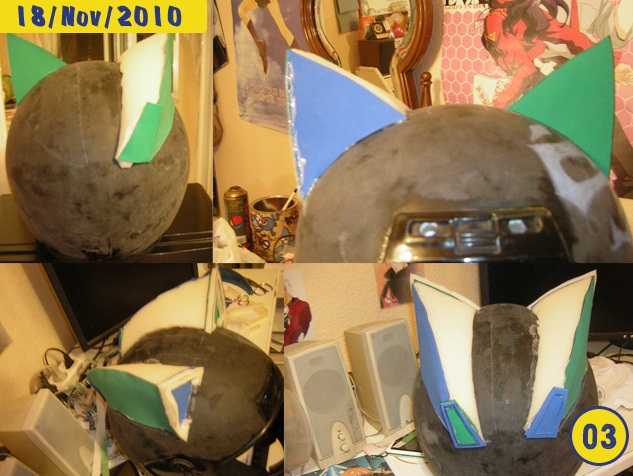
03. Here is where I actually started working on the ears! Probably many of you already noticed it, but the base materials for them were craft and cushion foam, which were glued to the helmet with hot glue (I already had everything I needed from past projects XD). I decided to use them because these materials had the exact amount of rigidness and flexibility I needed. What I didn’t like about them was that it’s easy to make mistakes when you’re attaching them (at least if you’re as clumsy as I am ^^u): if you do something wrong, structural defects will appear, and you’ll have to carry on with them until the end if you rush this step D: Hot glue doesn’t work well with plastics, but the high temperatures melt the foam making it more adherent and we previously sanded the helmet making it more porous. I also added more layers of different materials later which made the ears more rigid and durable, so they won’t break unless you deliberately throw the helmet with brute force (and I’ll be there to make sure that doesn’t happen D:<). Anyway, I’m grateful for the poor adhesive powers of hot glue on plastics, because I realized later that the symmetry of the ears was a little bit off, so one late night I used brute force myself to remove one of them and glued it again where it should’ve been from the beginning 8D
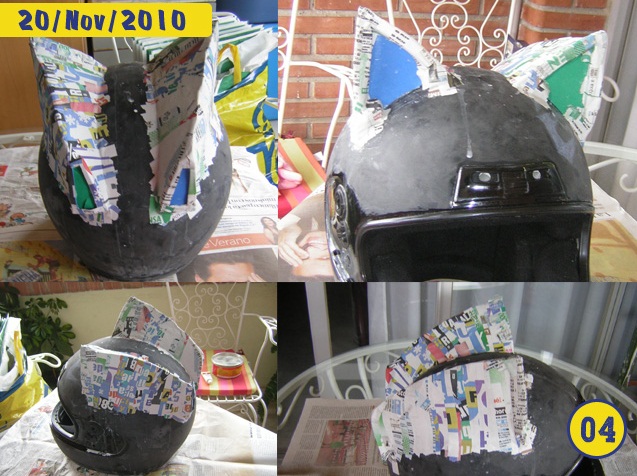
04. In order to give the union between the ears and the helmet a smoother finish, I covered them with a couple of layers of papier maché. In the previous step I positioned the “S” with chalk to make sure it looked good on that spot before painting.
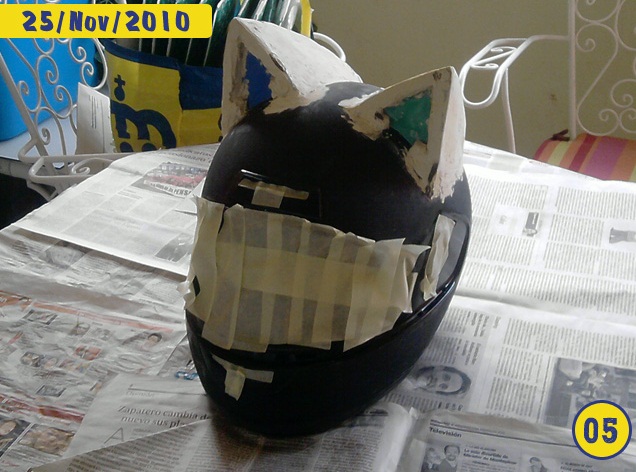
05. And here comes my most experimental step: I covered the ears with polyester putty (Bondo), a material I never used before. Pros were that it’s very durable, and adds a lot of stability when it hardens. The not-so-good part is that sanding it takes a lot of time (which I didn’t had, as usual -_-u), even if it’s easier than I expected. So please, make sure you have proper tools to do this and take your time when you use it! Applying any kind of putty in a rush without having enough patience to give them a smooth and even surface can kill any project.
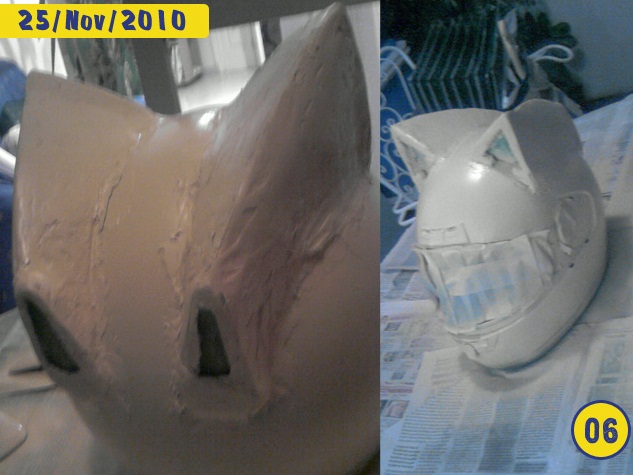
06. If the imperfections of applying Bondo in a rush were noticeable without painting, after a few coats of primer and the first layer of yellow paint the result was truly hideous. You cannot paint in a rush either (but this wasn’t my first time with this, so at least I knew that already, unlike the experience with the resin T_T): a few coats of primer are necessary in order for the paint to adhere properly (I use a special spray primer for plastics), masking parts you don’t want to paint, many coats with less paint are better than one big coat with a lot of spray, taking into account drying times, giving a good varnish at the end… it takes a ton of time, but you won’t regret it later!
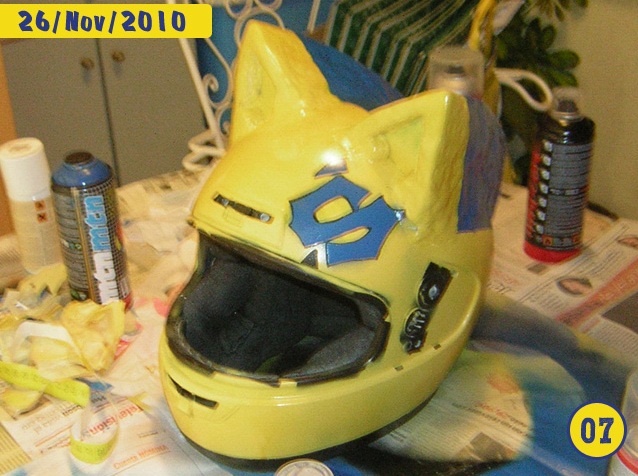
07. Wanting to gouge my eyes out every time I looked at the result, but taking into account my deadline as well, I decided to take emergency measures: I added an additional layer of paperclay to make up for the imperfections of previous steps. The ears ended up looking as if they were made from play-doh… yes, they were horrible, but not THAT much. I kept sanding at a minimum this time (and it shows). In this pic I was painting the last details (the S, the little triangles above the visor). As usual, I was running out of time because the con was the next day, so I had to rush everything -_- In this version, I outlined the S with a black POSCA paint sharpie for all surfaces (good stuff, I don’t know what I’d do without them *__* it’s funny that the very first time I used them was only to extract the ink and make wig dye, recommended by ~kobasho XDD), but I didn’t like the result, and so I didn’t do that on v2. The inside of the ears (front and back) is made from clear plastic with a couple of layers of primer and then sprayed black.
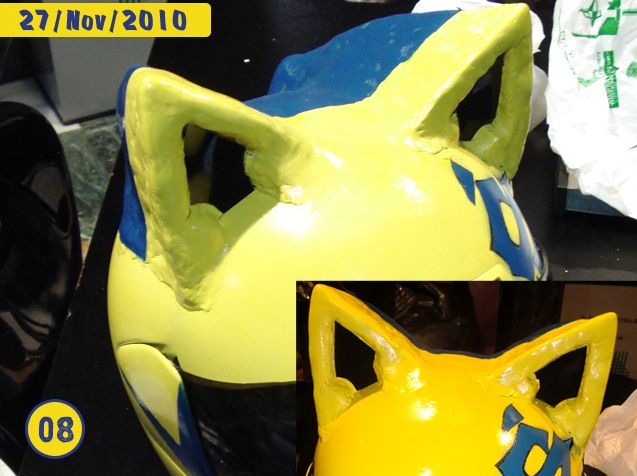
08. And here’s the helmet as I wore it the first time I cosplayed Celty: truly hideous. It was just ok if you saw it from afar or in photos if you resized them, but that’s all. After the con, I could barely glance at it ^^u
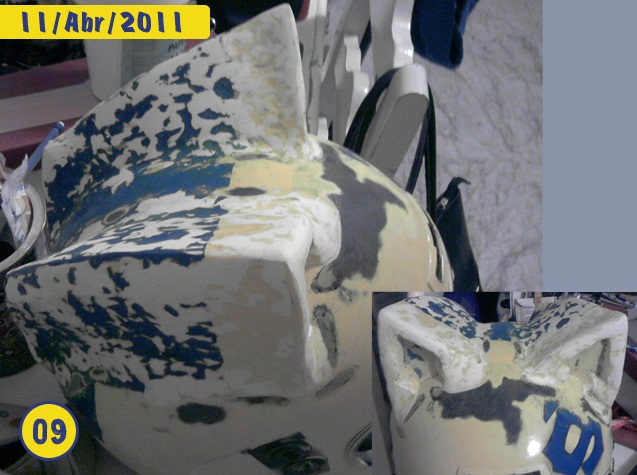
09. A new year, a new helmet! I don’t remember the exact date I resumed sanding, but I made sure to give it the time it deserved this time. Every day I picked up my sander, my glasses and my mask and spent at least 30 minutes with it. This was the helmet on that date. As you can see, the surface of the ears wasn’t even nor smooth thanks to me rushing with the polyester resin putty and paperclay later T_T
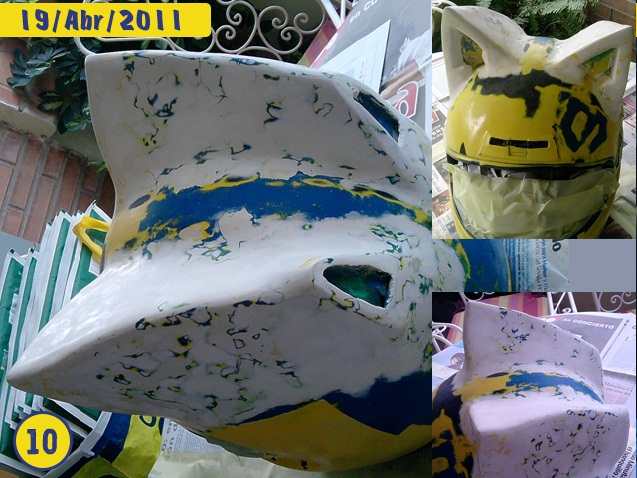
10. So I decided to buy a wonderful tube of filling putty, ready for use, and with lots of patience and my little modelling spatula I filled every crack, defect and gap that I revealed in the sanding process. There were a couple of big hollow places, the result of structural defects in the base materials, and I filled them with paperclay, more putty and sanded them like crazy like the rest. And I spent almost an entire month filling, sanding, and then filling again. I used different types of sanding paper, from ones that had bigger grain and were harder, used with the electric sander, to sanding by hand with ones with a very small grain (always protecting myself with mask, glasses and gloves). For all those people that asked me how I achieved that smooth look, here’s your answer… and it’s only patience :3
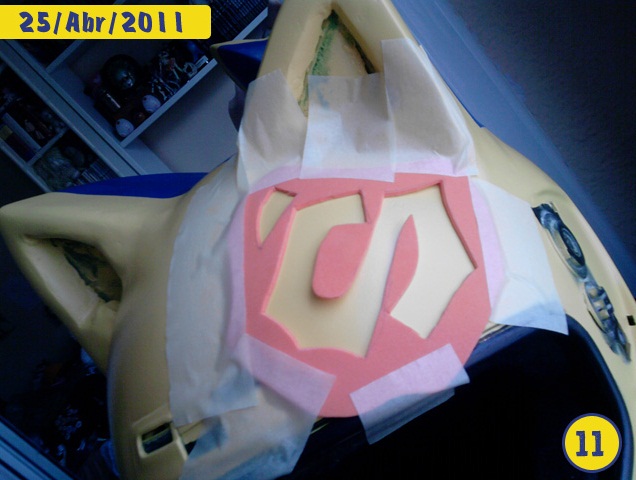
11. To finish this project, I painted the S, although in a different way from the first version. The first time I masked it with tape and spray-painted it, but it was difficult to get good results. This time I made a hollow pattern with craft foam, I secured them with tape and I painted it with a POSCA paint sharpie, because I was lucky to have one that had the exact tone of blue as the blue spray paint I used. As you can see in the final result, this sharpie is completely opaque and perfectly covers the surface. When everything dried, I gave it 4 coats of varnish, I re-attached the visor and…

12. …here’s the result :3 Despite its flaws, I really like it and I’m happy people apréciate it *^^* I learned a lot while making it, and if my experience can be useful to someone, that’s great! Thanks for reading all this, you deserve a prize for that O_o